Wrapping Your Holidays With Eco-Love
Good December, {NewNew} readers!
Last month, I promised you a blog with tips on how to eco-friendly decorate your home for the Holidays. I'm sorry to break the news to you, but I'm not writing about that this month. Instead, I'm sharing my favorite eco-friendly alternatives to gift wrap.
Yes, we are talking about decorating under the tree for your loved ones and the planet. I think it's a trade-off, but don't worry, you will get your tips for eco-friendly Holiday decorating. You can hold me to it!
Now, before I get into my favorite tips (that I've spent countless hours scouring and talking to people about), I wanted to share some quick facts on Holiday waste (courtesy of the Recycleworks.org):
- From Thanksgiving to New Years Day, household waste increases by more than 25%. Added food waste, shopping bags, packaging, wrapping paper, bows and ribbons - it all adds up to an additional 1 million tons a week to our landfills. (EPA and Use Less Stuff)
- In the U.S., annual trash from gift-wrap and shopping bags totals 4 million tons. (Use Less Stuff)
- The 2.65 billion Christmas cards sold each year n the U.S. could fill a football field 10 stories high. If we each sent one card less, we'd save 50,000 cubic yards of paper. (Use Less Stuff) Consider sending an electronic card.
- Ribbons--if every family reused just two feet of holiday ribbon, the 38,000 miles of ribbon saved could tie a bow around the entire planet.
- Paper Half of the paper America consumes is used to wrap and decorate consumer products. (The Recycler's Handbook)
I'm getting beside myself here. What is important is that you know how you can still celebrate your holiday in style just in a less expensive and harmful way. So here goes, my recommendations for your gift wrapping:
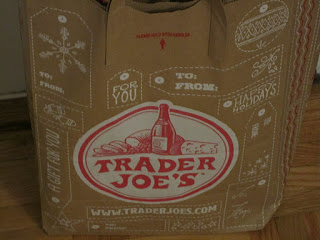
1. Kraft Paper. You have a ton of this already. If you shop at Trader Joe's or Whole Foods, your groceries get bagged in it. If you shop at almost any large retailer now, your goods get sent out the door in your hand in it - the paper bag. I am aware that some bags have colors and logos, but all you need to do is cut off the bottom of the bag and the handles and use the inside. I also encourage you to use the colored/logo side as well. For the Holidays, Trader Joe's bags have tags for you to cut out and use on your gifts, see below.
If your bag is plain brown, great! You have your own canvas to work with. Stickers you may have can be used, any stamps you have can also be used to create a pattern. If nothing else, grab some markers and draw different colored lines. Easy, peasy!
2. Tissue Paper. I save tissue paper from everywhere and anywhere. If my jeans are wrapped in it when I leave a store, I save the sheets, even with the tears from the label and use it for future wrapping. The excuse "you'll see through it" doesn't work since tissue paper rarely comes in sheets of one--two should do the trick nicely.
3. Newspaper, Maps, or any other antique looking paper. You are probably thinking about ink getting on your fingers. Well, you can not be an eco-warrior if you can't stand getting your fingers a bit dirty now and then! Newspaper makes great gift wrap because it's black and white, sometimes gray, meaning that any color bows or ribbons you use will contrast amazingly against the background. The word pattern also is done for you, so no stamping or coloring necessary.
The same goes with maps. If you have small boxes and an Atlas that you're considering throwing a way, don't! Take those old sheets of history and create new memories with it. I guarantee that everyone who gets a gift wrapped in old world maps will be mesmerized and full of disbelief!
4.Old Textiles. The Japanese have a technique called furoshiki, where they wrap gifts in cloth. You can take old bandanas, blouses, skirts, scarfs, cut them into a square based on the size of the fabric and the size you need for your gift and secure the open end with a button, safety pin, or simply knot it. Talk about a fashion statement!
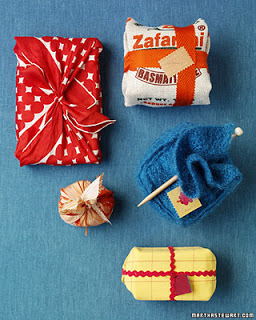
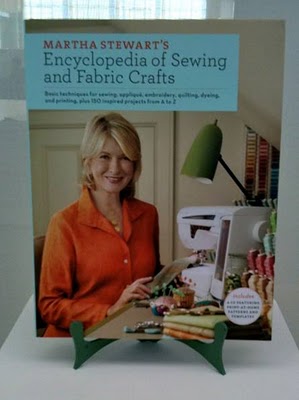
5. Potato Chip Bags. I am not kidding you on this one and I can not take credit for it. I got it from Martha Stewart and it is my favorite idea ever! I'm quite mad that I didn't even consider it on my own! Here's the genius of the idea: Cut open a potato-chip bag along the seam to reveal the shiny white or silver inside. Flatten the bag, wash it with soap and water to remove the grease, and then air dry. Once completed, wrap your presents and decorate with ribbons or bows, as you like. Now I have a feel good reason to eat chips-Yes!

Okay, so I think you're covered for your gift wrapping needs, but what about decorating? Bows? Ribbon? Here are my tips:
1. Aluminum Bows. Virginia Kraljevic (fellow blogger on the {NewNew}) posted a amazingly easy method to create a bow with a good already in your pantry- aluminum foil! The even better part is that aluminum foil is recycleable. Yep! After the gift is unwrapped, you can recycle both the paper and the bow. Awesome! The video also shows how to create a stamp from a rubber cork and apply that to your upcycled paper bag for decorating purposes. She then shows you now to put together the bow. It's easy, it's gorgeous and so simple, it blows my mind! Check out the Etsy video:
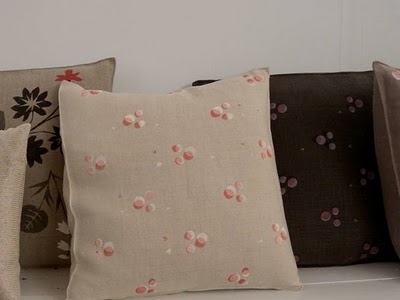
2. Paper Bows. Again, I'm not the genius behind this idea either, but I LOVE it! It's another simple and easy way to recycle paper and decorate your Holiday packages and I guarantee you have all the supplies you need already at home or in your work space. Coming from the website Splash of Something, Katrina gives you step my step instructions along with photos (like the one below) to help you make your paper bows out of magazines, newspapers, and even books. How cute!

3. Ribbon. Collect ribbon scraps throughout the year and use them for gifts. One of my favorite ribbon scrap methods is to take them from shopping bags. They are all the rage these days, so just be more aware of the bags you're bringing home and when you go to recycle the bag, unknot the ribbon handles and store for future gift giving!
Before you say, "but Sara, sometimes they are cord like and ugly", think about how you could personally embellish it or how lovely it will work with kraft paper. Also remember that it is one less piece of textile in a landfill and all those small boxes you are giving away would look lovely with a piece of the twine or cord around it. Shops now offer them in all colors and lengths, so your collection overtime could be large enough for all your gift giving needs!
Lastly, we're going to cover mailing packages. Not everyone is going to be local and you are bound to need to send a few packages to loved ones afar. Here are my two tips:
1. Reuse Boxes. I am a box junky. I am! Any box that is in relatively good shape, I keep for shipping purposes. They work wonderfully well and aside from having to black out any other shipping information so as not to confuse postal workers, they are solid. Plus this saves you money!
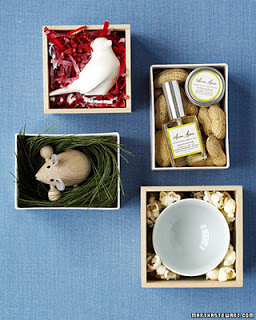
2. Stuffing. Now, I reuse magazines to stuff my boxes, but Martha Stewart shared a wonderful little technique that I also LOVE immensely - Biodegradable Stuffing! It cushions small, fragile items just as well as the non-eco-friendly stuff like bubbles or styrofoam nuggets. So use things like real peanuts and popcorn (the receiver may not want to eat stale popcorn, but they can peanuts!). Even better, both can be composted.
So there you have it! Ways to wrap, decorate, and ship all in an eco-friendly manner. I hope you use these and find them helpful. I look forward to sharing more environmental + crafting insight in 2012!
Happy Holidays!

Sara//