A Family History of Embroidery


Nordea's blog piece on Artful Embroidery (September 19) reminded me of my teenage years when my mother, a crewel embroiderer, taught me some simple stitches. We lived in the middle of Long Island, where there was never enough for kids to do. 

My mom was a craft person extraordinaire. She made braided rugs, like this, for the rooms in our home by going to rummage sales on the last day when a shopper could fill a bag for $1.


She loaded up on wool jackets and pants, cut the material into strips, sewed the strips together at the ends and folded as she went. She braided the folded strips and then sewed the braids into an oval, like this.


The artistry came in blending the colors that would sit next to each other in the rug.


My mom also made pictures from wool thread, called crewel embroidery. She made mostly simple flower and fruit compositions that went with our New England antique furniture: ladder back chairs and butcher tables and pewter sconces and mugs.


Crewel is a style of free embroidery thousands of years old, done on linen or cotton and many stitches allow the sight of the linen through and around the design. These pieces, like the pillow below, she would frame and hang on the wall above the couch in the living room.


Both my parents were painters, as were relatives on my mother’s side. One of them lived in a lighthouse and painted it, as well as other shore scenes. Some painted the farmlands of Hicksville, Long Island in the early 1900s, which is where they lived, on potato farms. My father painted landscapes in oil and my mother used all media for her pieces. She painted well into her 80s, traveling to Italy to live and paint in Rome for a month.

All my embroidery was done on faded blue jeans. 


My masterpiece was a blue jean skirt that I made from a cut up pair of jeans. I put a few flowers on it, like this:


But I kept working on it over time. In the end, it had the feel of this piece:


According to my mother, I wore it every day from Memorial to Labor Day. It had fringe and hanging threads on the bottom. It was not something that could be purchased at the Smith Haven or Walt Whitman Malls, which is where everyone shopped. It was probably the most comfortable thing I ever wore, and I made it. 

WinkandFlip

Fancy Pants


I love fun underwear. All my favorite panties are in colorful prints. Alas, fun prints aren't always easy to come by (or so my mother, who gives me underwear every year for Christmas, claims). The solution? Print your own!
The following how-to uses an onion to turn plain white panties into multi-color concentric-circle panties. It's a somewhat quirky take on a project I recently saw on the CraftStylish blog.

Materials

  • White cotton panties
  • Onion
  • Knife and cutting board
  • Fabric paint
  • Paint brush
  • Cardboard
  • Aluminum foil or other impermeable surface to use as a paint palette
  • Depending on the kind of fabric paint you use, an iron and press cloth
Steps
Slice off one end of a firm, nicely shaped onion. For ease of handling, I used the top end, which has a little tip you can hold on to.

Pour a little bit of each of the colors of fabric paint you want to use onto a piece of aluminum foil or other impermeable surface (perhaps an old ceramic plate).


Slip the cardboard in-between the front and back of the panties to prevent paint bleeding through to the other side. You might want to pull the fabric tight and fasten it to the cardboard  with a couple of binder clips. 

Brush the fabric paint onto the onion and press the onion onto the panties. I started with a few black prints followed by prints in red, blue and yellow. I used the same piece of onion for all of them because I liked the effect of the residual black paint outlining the structure of the onion and the other colors blending together. I also liked all of the impressions being the same size. You can, of course, choose to retain the the integrity of each individual color by using separate onion slices for each. 


Follow the directions on your paint to set the color in the fabric. Ta-da! Fancy pants!

A couple of tips: My blue, red and yellow paints were on the thin side due to the fact that I had to reconstitute them once after many years of disuse. This seemed to work well to create impressions that weren't too dense. To create similar quality prints with my black paint, which was of a more typical, thicker consistency, I first stamped the onion onto a piece of paper before stamping it on the fabric.

Until next time --

Enjoy!


Linda

Fashion Fall Preview at Brooklyn Indie Market


New York Independent Designers Have Got You Covered Under The Other Tent
September 18th, 11am-7pm At Brooklyn Indie Market Carroll Gardens, Brooklyn-Didn’t receive your invitation to Fall Fashion week? Never fear, Brooklyn Indie Market, on the corner of Smith and Union Street gets you on the “A list” with an unveiling of this seasons fall collections, keeping you current with ...a 2pm “Fashion A La Mode” fashion show, featuring just out-of-the-gate designers. Etsy.com and The {NewNew} present you shopping within reach all day long at Brooklyn Indie Market. Take the F/G train to Carroll Street Station, admission FREE.

2 pm Fashion Show Under The Red and White Striped Tent presented by the ladies of the Gotham Girls Roller Derby, who will also be holding a silent auction. Proceeds will go toward supporting the training and travel for their athletes who represent New York City on the national stage, and assist in the development of community outreach programs.


Sponsored by the {NewNew} and Better Than Jam Design Coop, 20 designers will showcase the latest in fall fashion from the independent design scene, offering you the opportunity to add the latest fashions to your wardrobe, at affordable prices. Preview the collections of up-and-coming designers under the red and white striped tent; from tunic dresses by BShorr (www.BShorr.etsy.com), to flirty bags by LolafalkDesigns (www.LolafalkDesigns.etsy.com). “Fashion A La Mode” Fall collections preview puts you in sync with the forefront in design bringing you limited edition styles.


Some of the new collections unveiled include:
Better Than Jam ‘s (www.BetterThanJam.etsy.com), screen printed designs with a bright color palette full of tunic dresses in soft bamboo cotton or more wintry styles with over sized collars and hoods. Stunning gold jewelry from Lingua Nigra (www.LinguaNigra.etsy.com) in bold or
ganic shapes and textures - first time at the Market. Kimmchi’s (www.KimmChi.etsy.com)summer designs now in the muted tones of fall, with some new designs in the mix.


Additional participating vendors will include:
Adornments NYC, Allene La Spina, Groundsel, KnitKnit, Melianna,Nemesis Jewelry, Sans Map


www.brooklynindiemarket.com
Email: kathymalone@gmail.com

How-To: Refit Old Jeans with Side Panels

We all have them. Those jeans that we USED TO be able to wear. Those jeans we WISH we could still wear. I admit I am guilty of keeping a bunch of jeans I wore in college. Ten years and two kids later, and there is very little chance that I will ever be able to wear them again, even if they were, by some odd chance, to come back in style again.

Since I have serious problems getting rid of perfectly good clothes, there is a simple solution: make the jeans fit by adding a side panel that provides a little more room. Let's start with the jeans we are going to refit.
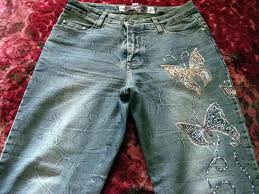
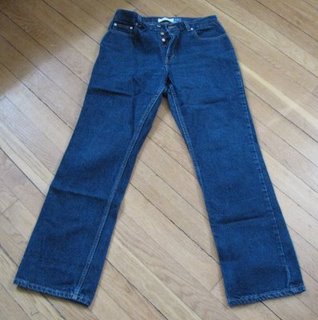
These jeans are pretty great, with the exception, of course, that they are about 2 sizes too small. On the plus side though, they are in great condition, they have the right length inseam for me, they have a button fly (which I love), and they are boot cut, so I won't have to add any additional width at the bottom to account for tapered jeans. They're also FREE, having been in my attic since I got pregnant with my 6 year old.

Incidentally, if you're not a denim hoarder like me, you can also do this with any pair of old jeans from the thrift store. In this economy, who wouldn't love to be able to walk into a store, pick up pretty much any pair of second-hand jeans in the store and know they could make them work?
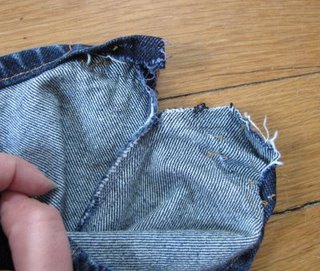
The first thing to do is to rip out the outseams with a seam ripper. I do this exactly the way your sewing instructor told you NOT to rip out seams. I put the seam ripper between the two sides of denim and cut the threads. Since the jeans have been sewn together with a chain stitch, you should be able to get enough play to just pull and rip without ripping a hole in the denim....and heck, it's quicker.

Cut all of the stitching on both sides from the beginning of the waistband to the hem. At the hem, tear out the stitches a few inches to either side of the seam and unroll the hem around the outseam.

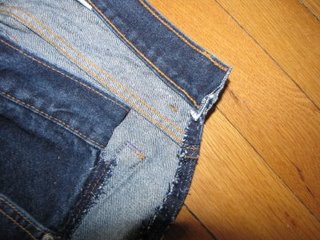
Once your seams are ripped out, remove the stitches and left over thread pieces. Do NOT press the jeans after doing this. At the waistband, cut the waistband straight up from the seam.
At this point, measure the outseam of the pants INCLUDING the extra fabric from the unrolled hem, but NOT including the waistband. This will be measurement A.

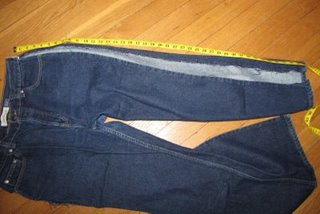
Additionally, measure the width of the waistband.
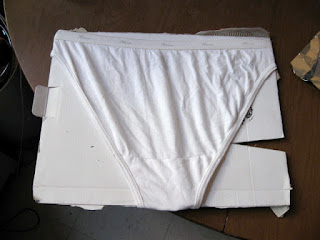
Then, try on the pants. Yes, post rip. Now you can get them on. The way I like to do this is by running a belt through the belt loops and tightening it so it hits at my waist.

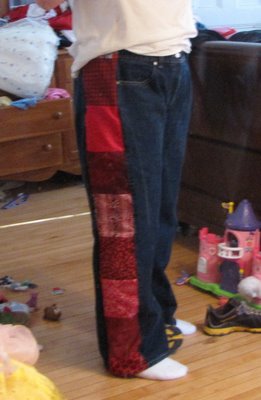
Straighten out the jeans so the seams are in the right place and measure how much space there is between the outseams. Measure in a few different places along your hips, thighs, and waist, and be sure to measure on both sides. One measurement will be the largest. Use that one to give you an idea of how wide your side panels will have to be, as you can see in my picture here.
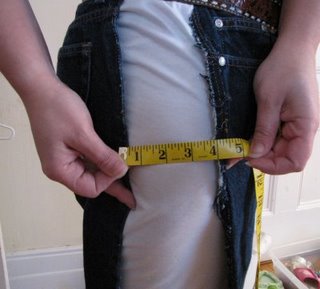
I need about 4" at the lower hip. For the panel I need to make, I will add 1" for seams and an additional 1" for comfort, for a total of 6" of width. This will be measurement B.

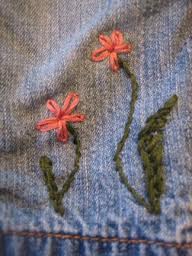
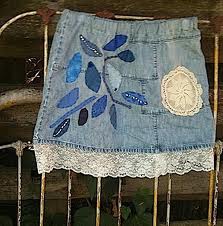
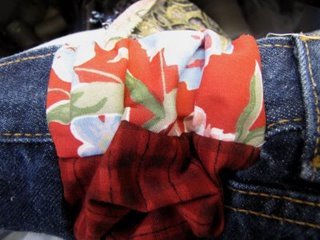
Note: this is a good time, if you want to, to add any appliques, embroideries, or other embellishments to your jeans.

Now, you know how large the side panels of your pants will need to be. (A long, by B wide). The easiest way to do this is to cut a single piece of fabric to that measurement. I, however, tend to prefer to make a patchwork panel for the sides of my jeans, so that is what I will be showing.
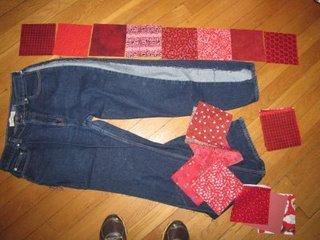
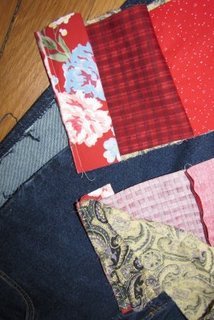
I start off by laying out the patches for my pants to get a good idea of how they will look. I then sew the patches together. Since the patches are cotton, and cotton is lighter weight than denim, I like to also add a lining piece of fabric for the inside of the jeans. This adds weight and also increases the durability of the panels.
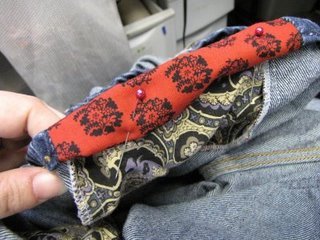
For the waistband, I take a piece of fabric the width of the panels and twice the length of the waistband plus 1" for seams. I fold the fabric lengthwise and place the raw edges lined up with the top of the panel going into the side of the pants. If you are using a lining piece, line this piece up also, matching the wrong side of the lining to the wrong side of the panel with the waistband piece on the outside, sandwiching the panel piece. Additionally, I like to have a small piece of heavy duty elastic to add to the inside of the waistband. This helps pull in the waist from the comfort inches I added into the pants earlier.

I cut a piece of elastic 1" smaller than the actual measurement I needed from the pants when I measured them (for me this is 3"). If you prefer not to have elastic in your waistband, make the waistband the actual width you needed added to your jeans plus 1" for seams, and taper out from the waistband measurement along the sides of the panels until you get to the full width of the panels at approximately 3-4" below the waist. I prefer the elastic because it allows for "fat days" and slight weight fluctuations.

Line up the elastic with the center of the waistband, pin right sides together, and sew your side panel onto your jeans. The easiest way to do this is to have the jeans on top going through the sewing machine, and sewing right along the old seam line. The jeans should still have a slight fold where the old seam was. Just slowly follow along in this. No worries about the different coloration from the dyeing of the denim showing,and the jeans will automatically press to the side after stitching so they lie flat.
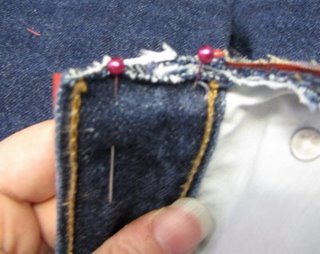
You will need to be careful when sewing around the rivet. Just go slowly and make sure you don't try to actually sew it. It should be off to the side, but in some jeans it is close.

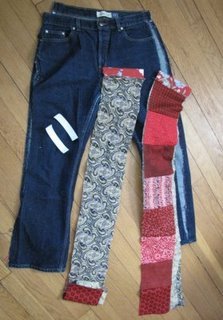
Once you reach the hem, you may have some fabric left--cut that off straight across. Then sew on the other side of the panel, again with the jeans on top. Stop right before you hit the waistband on the way up, pull the elastic through the casing, and sew everything together. It should look like this when you are done:
Repeat with the other side.

Once the side panels are all sewn in, I like to finish the seams. This will keep them from unraveling. I have a serger so I just serge the edges of the seams, just as they were before I ripped out the side seams of the jeans. If you don't have a serger, you can zig-zag along the raw edge, or you can use an over cast stitch if your machine has one.

For the hem, re-roll the jeans back to how they were originally rolled. The panel will start to roll for you. Just follow that roll all the way across, top stitch following the old hem seam, and you are done.
To troubleshoot length: If your jeans are NOT the correct inseam length, there are a few ways to work through this. If the pants are too short, measure how much additional length you need. you can either cut off the hem, and sew a length of fabric onto the bottom for this extra length as an easy fix, or you can use this more complicated method: After opening the outseam, but before measuring for the needed length of the panel, cut the measurement of the additional length you need above the hem plus one inch off the hem off the jeans. For example, if you need 3 extra inches, cut your jeans off 4" above the factory hem.

With the jeans open, sew a strip of fabric that is the extra length you need plus 1" for seams onto the bottom. Then sew on the hem of the jeans. Finish the jeans as above.

Try on your new jeans and give yourself a pat on the back.
One other trouble shooting tip: If your jeans are tapered at the ankle, you can counter that by tapering the bottom of your side panel so the bottom of your jeans is nice and straight...and along those same lines, if you like flares, just flare the panel as much as you want. Above all, feel free to experiment!

Another great thing about these jeans: If you get tired of the way they look, or if you lose or gain weight so they no longer fit again, you can just rip out the panels and start all over again! Good luck and Enjoy your new wardrobe!

303 Grand Artist & Fleas Market & Workshops

Come and join us for a fun filled weekend with members of the {NewNew} on March 12th - 14th at 303GRAND - a revolving storefront. Artists & Fleas is teaming up with 303 Grand to host an indoor market featuring up to 20 different local artists/designers and awesome DIY workshops, including a needle felting workshop with KnitKnit!

303 Grand St. (at Havermeyer), Brooklyn, NY [MAP]
Thursday-Friday 4-9pm, Saturday 1-9pm
www.303grandnyc.com


{NewNew} members who will be selling + their dates (from left to right):
CajaJewelry (3/14),
KnitKnit (3/13 - 3/14),
MarySavel (3/12 - 3/14),
CollectiveElements (3/14), and KimmChi (3/14)


303 GRAND WORKSHOP
Learn how to needle felt with KnitKnit!
We will make soft, felted creatures and shapes using a felting needle and wool.
No previous experience required, but the workshop is not recommended for children as there will be sharp needles involved.
Friday, March 13th from 5-6 pm. $35.00 - materials will be included in class fee. More info! Pre-register with Selena at Selena@303grandnyc.com. Hurry - there are only 10 spots available!


Hope to see you there!

Nguyen
KnitKnit