Where to find the {NewNew} on Feb 28 + March 1


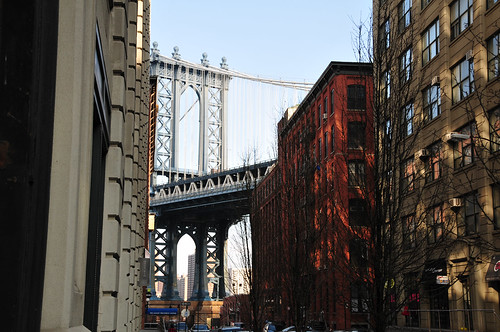
The {NewNew} will be back in Dumbo this weekend. On Saturday, jewelry & cards by prismpop // pcharming, soy candles & home accessories by lucrafts and jewelry by mulryjewelry. On Sunday, jewelry by yaniamor and wishbyfelicity, as well as knitted wristwarmers & pins mellowbeing. Stained glass pendants & jewelry by Citybiz will also be present on both days. [MAP]
Also, PulpSushi will be at the The 1st Annual Hudson Valley Social Pariah Fest on Saturday at the Holiday Inn in Fishkill, NYP from 2-10pm to benefit The Pitch for Kids Fund. [MAP]

Wai Sze
http://waisze.etsy.com/

Tutorial: Using Beaded Jacobean Couching to Fill Embroidered Shapes

This embroidery technique is a variation on a stitch called "Jacobean Couching" that uses beads to give your project some added elegance. This project is not difficult, though it is helpful to have some knowledge of basic embroidery. Here are the materials you will need:

1. Embroidery Floss.
2. Seed Beads.
3. Regular sewing thread in a color that matches your beads.
4. A heat-transfer pencil.
5. An air-soluble pen (a pen that makes a mark which will disappear in a day or so).
6. A transparent gridded ruler.
PLUS, tracing paper, scissors, a home iron, fabric to embroider your design onto, and an embroidery hoop. For this project I used a 6" hoop.

STEP 1: Trace your design onto tracing paper using the heat transfer pencil. I chose an eight pointed star - you can choose pretty much any image you like, as this technique works well for filling any simple shape.

STEP 2: Iron the design onto your fabric. Use the hottest setting that will work for your chosen fabric, turn the steam setting to "off," and do not let your design shift while ironing. My design was transfered after about ten seconds of ironing.

STEP 3: Outline your design using any stitch you like. I chose to use the Stem Stitch, which is illustrated below. For this project, I did my stitching with three strands of embroidery floss. A handy set of illustrations for various outline stitches can be found here.

STEP 4: You are going to run a series of parallel threads over the entirety of your design. I chose a distance of 3/8". Using your transparent gridded ruler, make small dots right next to your outline, indicating where your parallel stitches should be placed. The ink should disappear in a day or so, but it's still best to keep your marks as small as possible.

STEP 5: Using the marks you've made, create a series of long parallel stitches that fill up your entire shape.


STEP 6: Decide whether you would like to end up with a shape filled with squares or diamonds. If you want squares, you should make your second set of parallel stitches at a 90 degree angle to the first set. I decided I wanted diamonds, so I chose a random angle, and simply made all my stitches parallel to the first line that I made at random.

STEP 7: Once you have filled your entire shape with a grid of long stitches, you can start adding the beads. Thread your needle with a double strand of regular sewing thread, then bring your needle up through the fabric right next to the place where two threads cross.

Thread a bead onto your string, and bring your needle back down through the fabric on the opposite side of the crossed threads.

To make sure your beads are securely stitched onto the fabric, bring your needle back up, and make a second stitch through each bead before moving on to anchor the next intersection of threads. Keep going until you've tacked down all your threads.

STEP 8: Admire the beauty!

Where to find the {NewNew} on Feb 21 + 22


The {NewNew} will be back in Dumbo this weekend. On Saturday, silkscreened accessories by redbridge, monsters by karensmonsters, and jewelry by joyella. On Sunday, organic knits by wrenstore, jewelry by yaniamor as well as jewelry & cards by prismpop // pcharming. Stained glass pendants & jewelry by Citybiz will also be present on both days. [MAP]


Wai Sze

http://waisze.etsy.com/

Pillowcase How-To

Refashioning Your Old Pillows

An easy way to add some spice to your space is just to change something superficial, like a pillow. If you’re disinclined to go out and buy new pillows, it’s easy enough to just cover up the old ones. Instead of covering my pillow completely, I’m going to make an envelope style pillowcase so I can take it off to wash occasionally.

My mom covered this pillow for me when I was in high school. I recently opened it up and realized that the original pillow is a Minnie Mouse pillow that I loved when I was 7. I’m no longer into either of these patterns, though they were perfect at the time. So it’s time for something new. After digging through my fabric stash, I found the perfect fabric to fit my life now. (Alternately, you can use old curtains, a moomoo from the thrift store, sheets, etc just find something you like.)

What you’ll need:
A pillow to cover
Fabric (a large enough piece to cover your pillow and then some)
Scissors
Measuring Tape (I used a measuring tape, a yard stick, and a hem gauge)
Pins
Sewing Machine (or you could sew it by hand)
Matching or Contrasting Thread
Tailors Chalk

Step 1

Measure your pillow. Mine is approximately 18 inches square, measured from seam to seam.

If you want a nice and snug fitting pillowcase, don’t give yourself a seam allowance when you measure out your front piece. My pillow is a little flat, so I’m going to make one large square of 18 x 18 inches for the front panel.

For the back panels, I’m cutting out 2 rectangles, each 18 inches long. One is 11 inches wide and the other is 13 inches wide. The back panels will need a seam allowance on the overlapping edges of 1 inch each, plus they need to overlap by at least 1 inch. I like a lot of overlap so that they stay firmly in place.

Use this to check what your overlap will be: Overlap = (Width 1 + Width 2) – 2” seam allowance – height of pillow.

Mine is: 11 + 13 – 2 – 18 = 4 inches of overlap (this might be a little bit of an overkill).

After you’ve figured out what size each panel should be, draw directly onto the wrong side of your fabric and cut out your panels.

As you can see, my back panels are a different fabric than the front. No rhyme or reason there, just felt like it.

Step 2

Using a measuring device (I used my hem gauge), fold over 1 inch of one of the 18-inch sides of each back panel, then pin and iron. Then tuck half of that under itself, so the hem is only half an inch, like shown, ironing and pinning again.

Using your sewing machine, sew each hem in place, taking out the pins as you come to them. I chose to use a thread color that matches the front and contrasts with the back panels.

Step 3

If you wish to embellish the front, now would be a good time to do so, however you’d like. I chose to let the pattern on the front speak for itself.

Now pin the pieces together with the right sides facing inside.

Overlap the top and bottom back panels, pinning well, so that together the two back panels match the front panel.

I like to have the top back panel on top when all finished, so I pin it underneath the bottom panel, so it switches when I turn it right side out.

You can choose to have right and left back panels instead of top and bottom. That’s especially nice if you have a longer rectangular pillow, instead of a square one.

Step 4

Sew it all together!

One seam around taking out the pins as you go works fine, I keep a ¼ inch seam allowance. And do backstitch both the beginning and the end, which are in exactly the same place.

Snip the corners off, careful not to cut the seam.

Step 5

Turn it right side out. I like to use a chopstick to get the corners all pointy. A pencil or your finger can work fine too.

And now stuff it with your pillow.

Et voila!

By Karen
www.KarensMonsters.com

Where to find the {NewNew} Valentine's Day Weekend

Do something special this Valentine's Day. NYCreates Launches The Red Show: A Valentine’s Arts and Crafts Fair and Celebration at the Brooklyn Historical Society for three whole days! Our very own MilkMade will be present featuring her original milkcap jewelry & accessories. [MAP]

We are back at the Brooklyn Flea Winter Pop Up Market in Dumbo this weekend! On Saturday, silkscreened clothing and accessories by BetterThanJam, jewelry by wishbyfelicity and cards + scrapbooks by waisze; as well as stained glass accessories by citybitz. On Sunday, we have jewelry from jantar, knitted accessories by knitknit, as well as pointillistic cards by warpedesign. We'll be there from 11-6pm. [MAP]


Where to Find The {NewNew} on February 7 + 8


Start tonight off right with decoupage jewelry by wabisabibrooklyn from 6-9pm and Saturday from 12-6pm at the Valentine's Trunk Show hosted by artez'n. Psst, there will be chocolate and wine served on Friday only (aka "PMS" night) [MAP]

"Forget Me Not" A cool embroidery art exhibition opens tonight from 6-8pm featuring embroidered lovelies by loveforever and miniaturerhino at Gallery Hanahou. [MAP]

Show your support at the Park Slope Valentines Day Fair on Saturday from 10 - 5pm at the Secondary School for Research. Enjoy baked goods and handmade crafts featuring jewelry by yaniamor and jantar; as well as knitted accessories by knitknit. [MAP]

Visit monsters by karensmonsters on Saturday and Sunday from 12-7:30pm at Artists and Fleas [MAP]


Have you heard about the new Winter Pop Up Market yet? Hosted by the Brooklyn Flea, the {NewNew} team is excited to showcase our wares this weekend! Here's the lineup. This Saturday you'll find new original jewelry by kokalakijewelry, latelierdesbijoux, mulryjewels and stained glass accessories by citybitz. On Sunday, we have lovely jewelry from jantar and joyella, as well as cards + scrapbooks by waisze. We'll be there from 11-6pm [MAP]

Across the bridge in Manhattan, simple yet chic jewelry by sarustar at The Young Designers Market on Saturday and Sunday from 11am-7pm. [MAP]


Handpainted illustrations and jewelry by allenelaspina on Sunday from 3-7pm at the Designer's Market located in Cafe Cornichon. [MAP]
And last but not least, paintings by LaSha at the Queens Flea Market at St Nicholas of Tolentine Catholic School on Sunday from 10-4pm. [MAP]
Or Get your Crafts On at these events:
If you couldn't make it to the "Forget Me Not" art exhibition then stop by on Saturday afternoon for a workshop hosted by loveforever at Gallery Hanahou from 1-4pm. [MAP]
Craft your Winter Blues away on Sunday from 2-5pm at Love in the Crafternoon at the Painted Cloud. [MAP]
Get your needle crafts on with knitknit for Craft Night on Monday night at the Etsy Labs! Nguyen will be teaching you how to needle felt hearts for Valentine's Day! [MAP]


-Wai Sze
http://waisze.etsy.com/